
Jira Automation — User Guide
Overview
Bulk Clone Pro can be used as an action inside Jira Automation rules. This lets you automatically clone Work Items when certain conditions are met — for example, cloning a set of template issues every time a new Epic is created, or on a scheduled basis.
Prerequisites
- A saved Bulk Clone template — to create one, go to Filters > Search for work items > Apps (top right) > Bulk Clone, configure your clone settings (target mappings, options, field values), then click Save as Template and choose a name and visibility. See the Template Users Guide for full details.
- The template must be set to Public visibility, or you must be the template owner
- Jira Automation access (Project or Global automation)
Setting Up an Automation Rule
Step 1: Create a New Rule
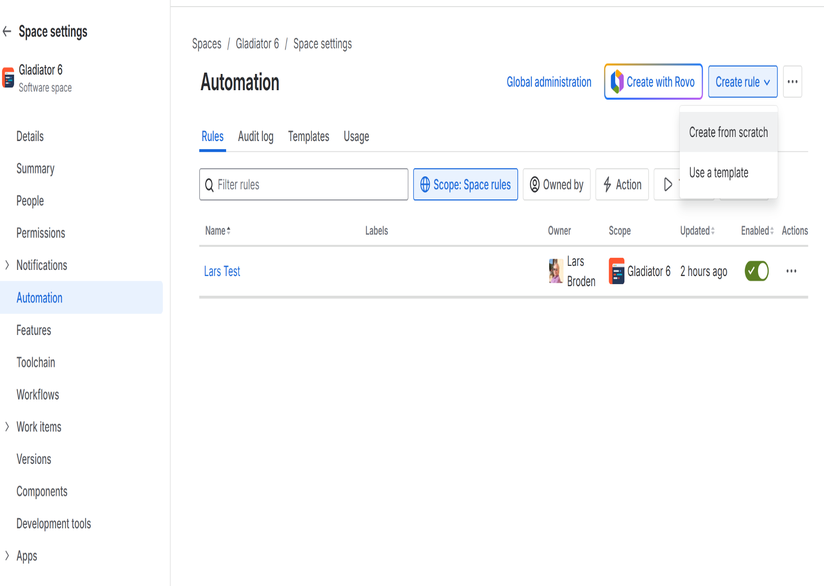
- Go to Space Settings → Automation (or Global Automation for site-wide rules).
- Click Create rule from scratch.
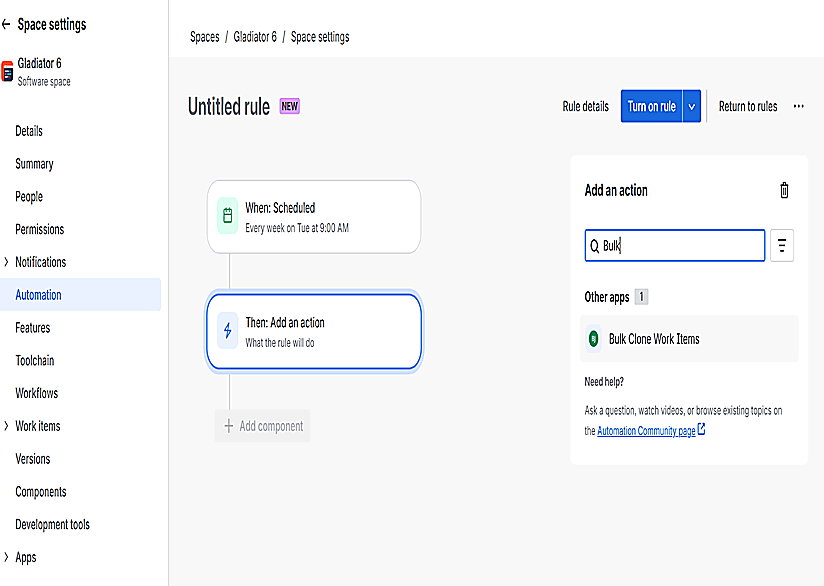
3. Choose a trigger (e.g., “Issue created”, “Scheduled”, “Manual trigger”)
Step 2: Add the Bulk Clone Action
- Click Add action → search for Bulk Clone Work Items.
- The Bulk Clone configuration panel will appear.
Step 3: Select a Template
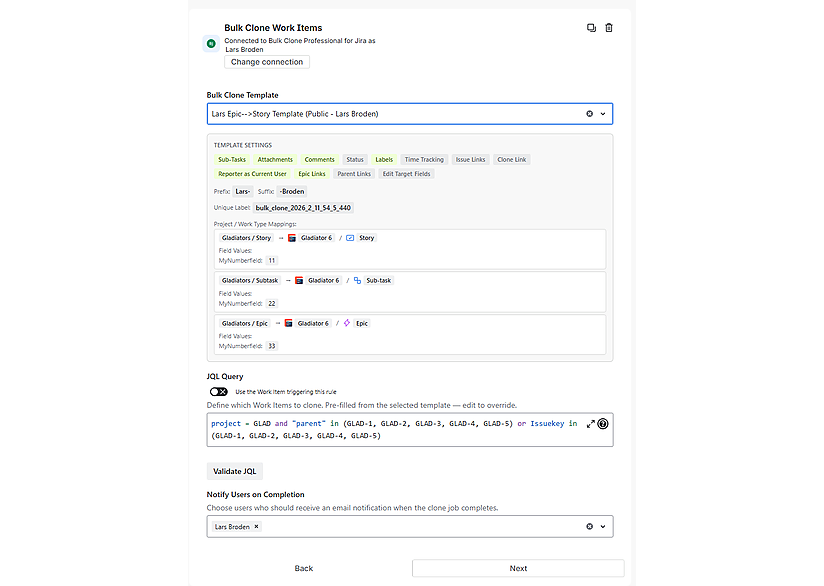
Choose a saved template from the dropdown. The template controls:
- Which projects and issue types to clone into (target mappings)
- Clone options: subtasks, attachments, comments, labels, status, links, etc.
- Field mappings: custom field values for each project/issue type combination
- Prefix/Suffix: text added to cloned issue summaries
After selecting a template, its settings are displayed as a summary panel so you can verify the configuration.
Step 4: Configure the JQL Query
The JQL query determines which issues will be cloned when the rule fires.
Warning: Make sure the issues matched by your JQL belong to projects and issue types that are configured in your template’s project/issue type mappings. If an issue’s project and issue type combination does not match any mapping in the template, the issue will be cloned into the same project and issue type as the original — which may not be what you intended.
Option A: Use the trigger issue
Toggle “Use the Work Item triggering this rule” ON. This sets the JQL to key = {{issue.key}}, which clones only the issue that triggered the automation rule. Jira resolves {{issue.key}} at runtime.
Option B: Custom JQL
Leave the toggle OFF and enter any JQL query. Examples:
project = TEMPLATE AND type = Task
project = TEMPLATE AND fixVersion = "2024-Q1"
labels = "clone-me" AND status = "To Do"
Click Validate to check the query and see how many Work Items match.
Note: When using Jira smart values like
{{issue.key}}in custom JQL, the validate button won’t resolve them — they only work at runtime.
Step 5: Add Notification Users (Optional)
Use the Notify Users picker to select people who should receive an email when the clone job completes. The notification includes:
- Template name used
- Number of issues cloned vs. total
- Success or error status
- Completion timestamp
Step 6: Save the Rule
Click Save to finish configuring the action. You can add conditions, branches, or other actions as needed.
How It Works
- When the automation rule fires, Bulk Clone Pro receives the template key and JQL.
- The app validates the JQL and counts matching issues.
- A clone job is enqueued and runs in the background (up to 15 minutes).
- Each matching issue is cloned according to the template settings.
- If notification users were specified, they receive an email when the job finishes.
The action returns immediately — cloning happens asynchronously. This means subsequent actions in the automation rule do not wait for cloning to complete.
Outputs
The Bulk Clone action provides these output values that can be used in subsequent rule actions:
| Output | Description |
|---|---|
jobId |
Unique identifier for the clone job |
totalIssues |
Number of issues matched by the JQL query |
clonedIssues |
Number of issues cloned (0 at action time, updates async) |
clonedIssueKeys |
Comma-separated list of cloned issue keys |
Access these in subsequent actions using: {{bulkclone.jobId}}, {{bulkclone.totalIssues}}, etc.
Error Handling & Notifications
There are three failure scenarios, each with different notification behaviour:
1. Action fails before cloning starts (bad template, invalid JQL, 0 matches)
The action returns an error to Jira Automation. Whether you receive an email depends on the rule’s Notify on error setting (configurable per rule under Rule details). By default, Jira Automation notifies the rule owner on failures. The error also appears in the Jira Automation Audit log.
2. Clone job runs but some issues fail
If Notify Users were configured in the action, they receive an email from Bulk Clone Pro with the error details, cloned/total counts, and completion timestamp. This requires at least one issue to have been cloned successfully.
3. No Notify Users configured
No Bulk Clone email is sent. The job status is still visible in: – Settings > Bulk Clone > Log (Jira admins only) – The Jira Automation Audit log (shows the action’s return values)
Tip: Always add at least one user to the Notify Users picker so you’re alerted when automation clone jobs complete or encounter errors.
Monitoring Clone Jobs
Clone jobs triggered by automation appear in the Bulk Clone Log tab (Settings > Bulk Clone > Log) for Jira administrators only. Automation jobs run under the system user automation and are merged into the admin’s log view alongside their personal jobs.
The Dashboard tab (available to admins) shows all jobs across all users, including automation jobs.
Troubleshooting
| Issue | Solution |
|---|---|
| “0 issues matched” | Check JQL syntax; smart values won’t resolve in preview |
| Template not in dropdown | Ensure template is Public or you own it |
| Cloned issues use wrong project | Check template project/issue type mappings |
| No notification email received | Verify users were added; check Jira notification settings |
| Rule times out | Clone runs async (15 min max); the rule itself won’t wait |

We offer professional services within Software Management, Enterprise Agility, Process Engineering, & Tooling. We also offer commercial IT add-ons for Workflow Management Products

We have extensive worldwide experience in countries such as United Kingdom, Germany, United States, France, Sweden, Denmark and others